To allow Profit Diagnostix to access your data using the Ezyvet API the integration has to be activated and the credentials send to support@profitdiagnostix.com.saved. It is best to log into Ezyvet before Profitdiagnostix and retrieve your credentials.
Ezyvet setup
Login to your EzyVet account. Please Note that this account needs administrator permissions.
Got to the “Admin” tab and select “Integrations” in the dropdown menu on the left
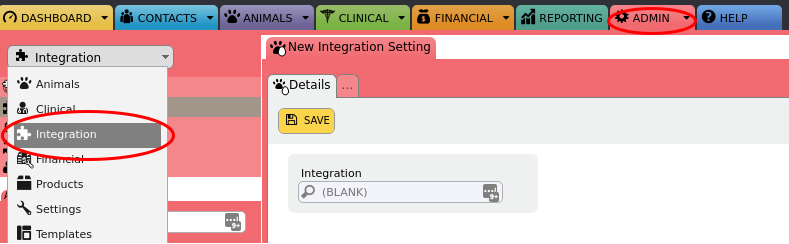
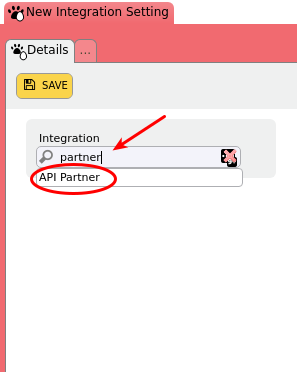
Type “partner” into the “Integration” search box and select “API Partner“

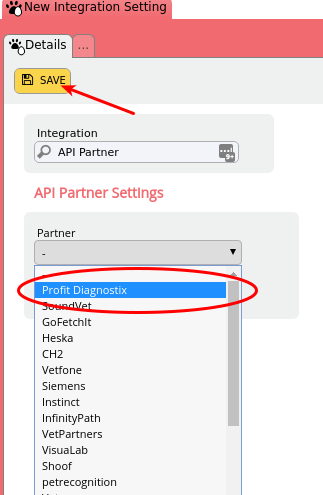
Select “Profit Diagnostix” in the “Partner” dropdown menu and press “SAVE”
On the “Scopes” (Permissions) section press “Select All”, then “Save”.
Now you can download the credentials (as a textfile) by pressing “DOWNLOAD CREDENTIALS”.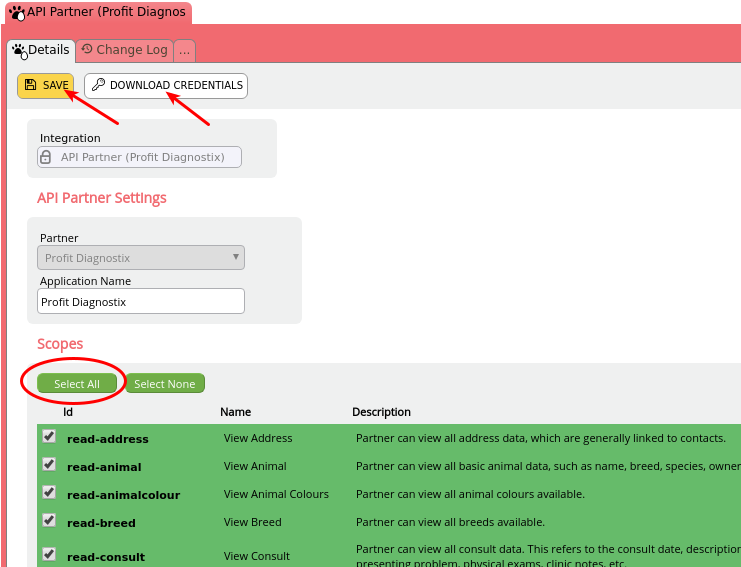
Now send open the downloaded text file “credentials-<your clinic name>.txt” to support@profitdiagnostix.com.
Our team can now setup the integration.
Note: The easiest way is to set read permissions to all elements. The minimum permissions Profit Diagnostix needs to build you reports are:
...
Have this ready to copy and paste the credentials into Profitdiagnostix.
Your credentials will look like the below ( Click to enlarge )

You can find the download by going to the Folders icon → Downloads, or Notes, or go to the quick access menu. ( the credentials will be sitting there )
To Connect to Profit Diagnostix
Log into your Profitdiagnostix System Here: https://my-reports.slyncy.com
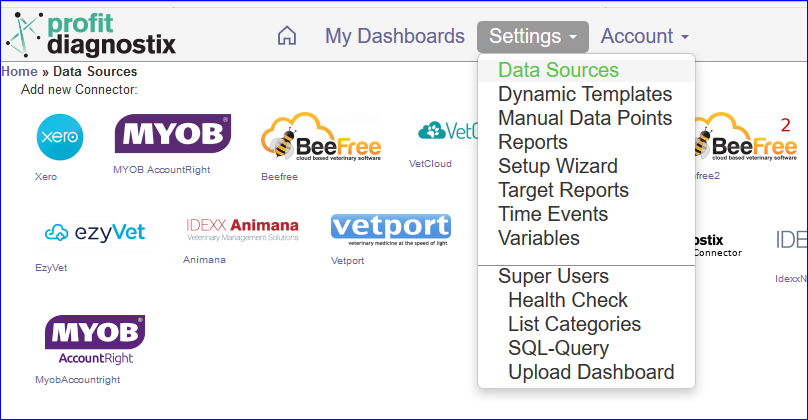
Go to Settings → Datasources on the main Menu
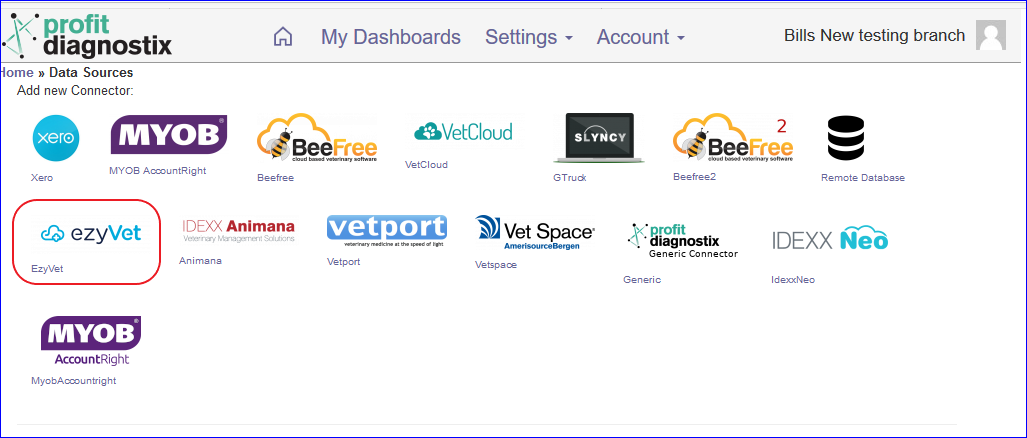
Select the Ezyvet Icon
Enter the credential information you saved from Ezyvet as shown below
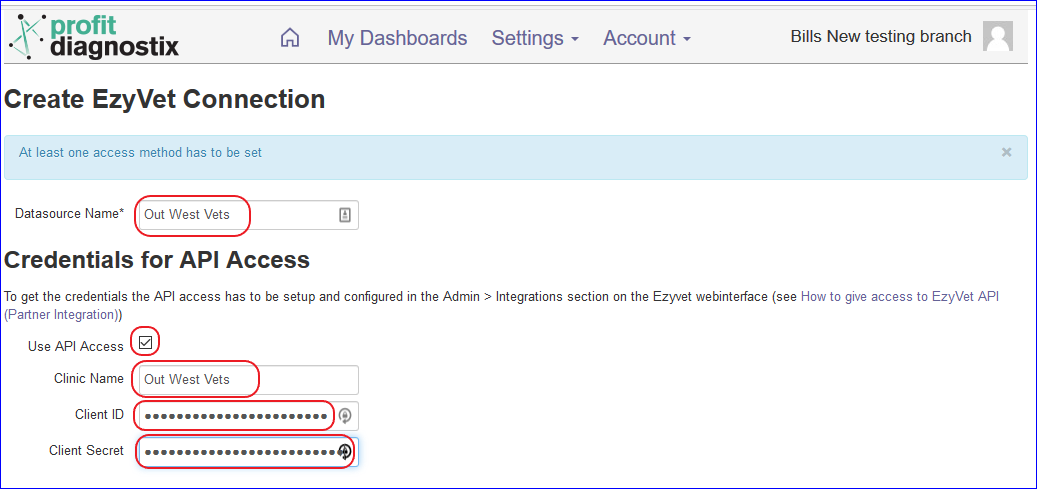
(As of 18/6/2021, a new input box appeared below Client Secret' labelled ‘Custom URI’. This was left blank and the connector seemed to work with it blank. I presume this is only if you wish to use a non standard URI eg. sandbox. So the norm would be to leave it blank.)
Click Create at the bottomThe datasource will appear. The next step is to link a template.
Settings → Datasource → At the Ezyvet connector → Click the Configure tab
At the drop down menu
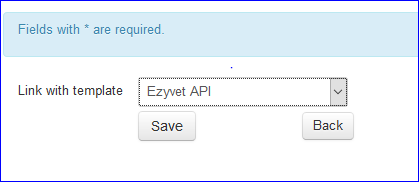
Choose the Ezyvet API Option and Save
The final step is run a Full queue. Click the drop down arrow beside Queue to run a full backup of the last two years data. Queue will only load the last three months (do not use this option)

Ezyvet is loaded.