How to give access to Reckon Hosted
Reckon hosted is on a server managed by Reckon. There is no way a g-truck app can be installed on these servers, so the only option is to download locally a valid file to a workstation where g-truck is installed.
The best way to deal with Reckon hosted is to regularly download a copy of a QBB or QBW file to a local workstation.
Note that Reckon hosted has a 2 layer log-in.
Firstly log into the site.
Then log in using the Admin user name and password.
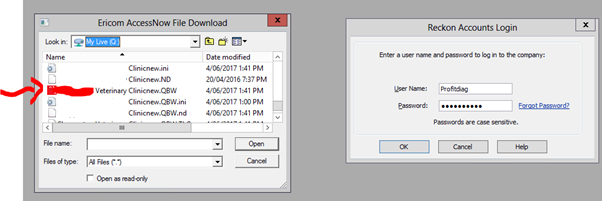
Make sure that the required file is not open. If it is open it will not allow the download. So on the second login screen, do not log in, instead click the download button in the top right corner as per image below:
Select the name of the correct file usually in the ‘my live’ folder, it is the QBB or QBW file with the Reckon icon:
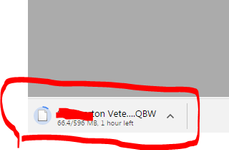
The file will download:
Always put it in the same place on the local workstation and the installed gtruck app should be able to get it.
Note the download is large and can take some time unfortunately, but if the user downloads it to the correct folder overnight and always gives it the same name they should be able to leave it overnight.
Gtruck
- You will be given a link to download gtruck/slyncy. Download and install.
- The gtruck will sit in the bottom right tray, and will only pop up when running.
Once the company file is downloaded to a local workstation, the set up is similar to a locally running Reckon system.
QODBC
- Download and install the qodbc.exe file from here: http://assets.slyncy.com/install/qodbc1.exe
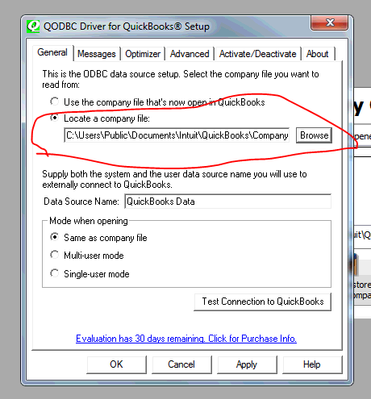
- Go on the start menu and search QODBC >> select the QODBC Setup Screen. Find the location of your saved company file and map under "Locate a company file". Take note of the Data Source Name. Click OK.
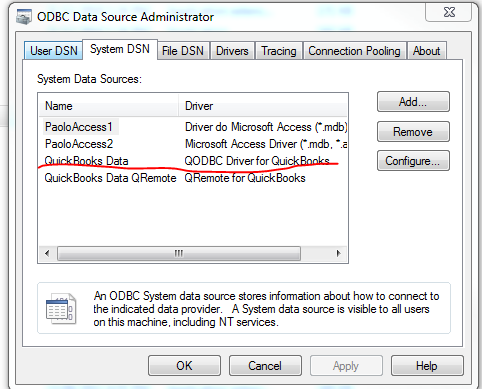
- You can optionally validate if the data source has been installed by going to: C:\Windows\SysWOW64 and executing odbcad32.dll. Here you will see the same data source under system DSN
- Open the Reckon company file as ADMIN.
- In Profitdiagnostix, go to Settings >> Data Sources
- Click Queue:
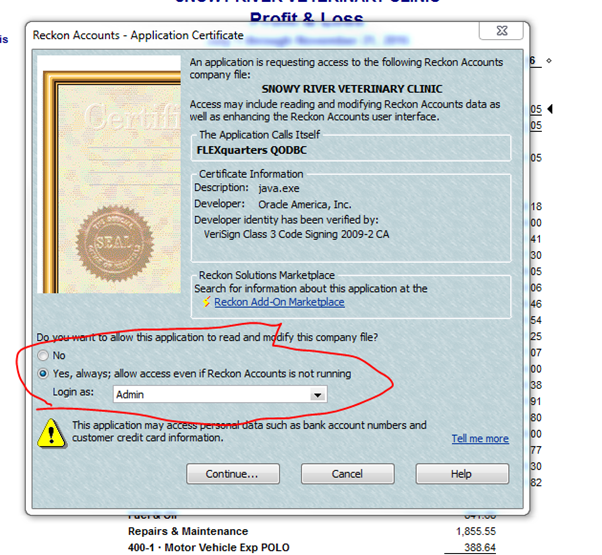
- An application certificate will pop up. Click yes, and login as Admin. Continue.
- You will see in the bottom right corner the data being pulled.
- The data will sync and when finished will say "Done"
With everything setup, each time a new company file is downloaded, you will have to open the file in Reckon and accept the Application Certificate.
- Download the company file and save in the same location
- Open/restore company file in Reckon, leave open.
- Click queue in Profitdiagnostix- Settings >> Datasources

